Bending Tubing, Including Bells
Another job that is often challenging and takes time and practice to accomplish satisfactorily and predictably is bending tubing, including bell stems. Making wide curves with small diameter tubing such as cornet and French horn mouthpipes and trumpet bell stems is fairly easy, but some of the information below will make even these more attractive and you can move on to more challenging projects.
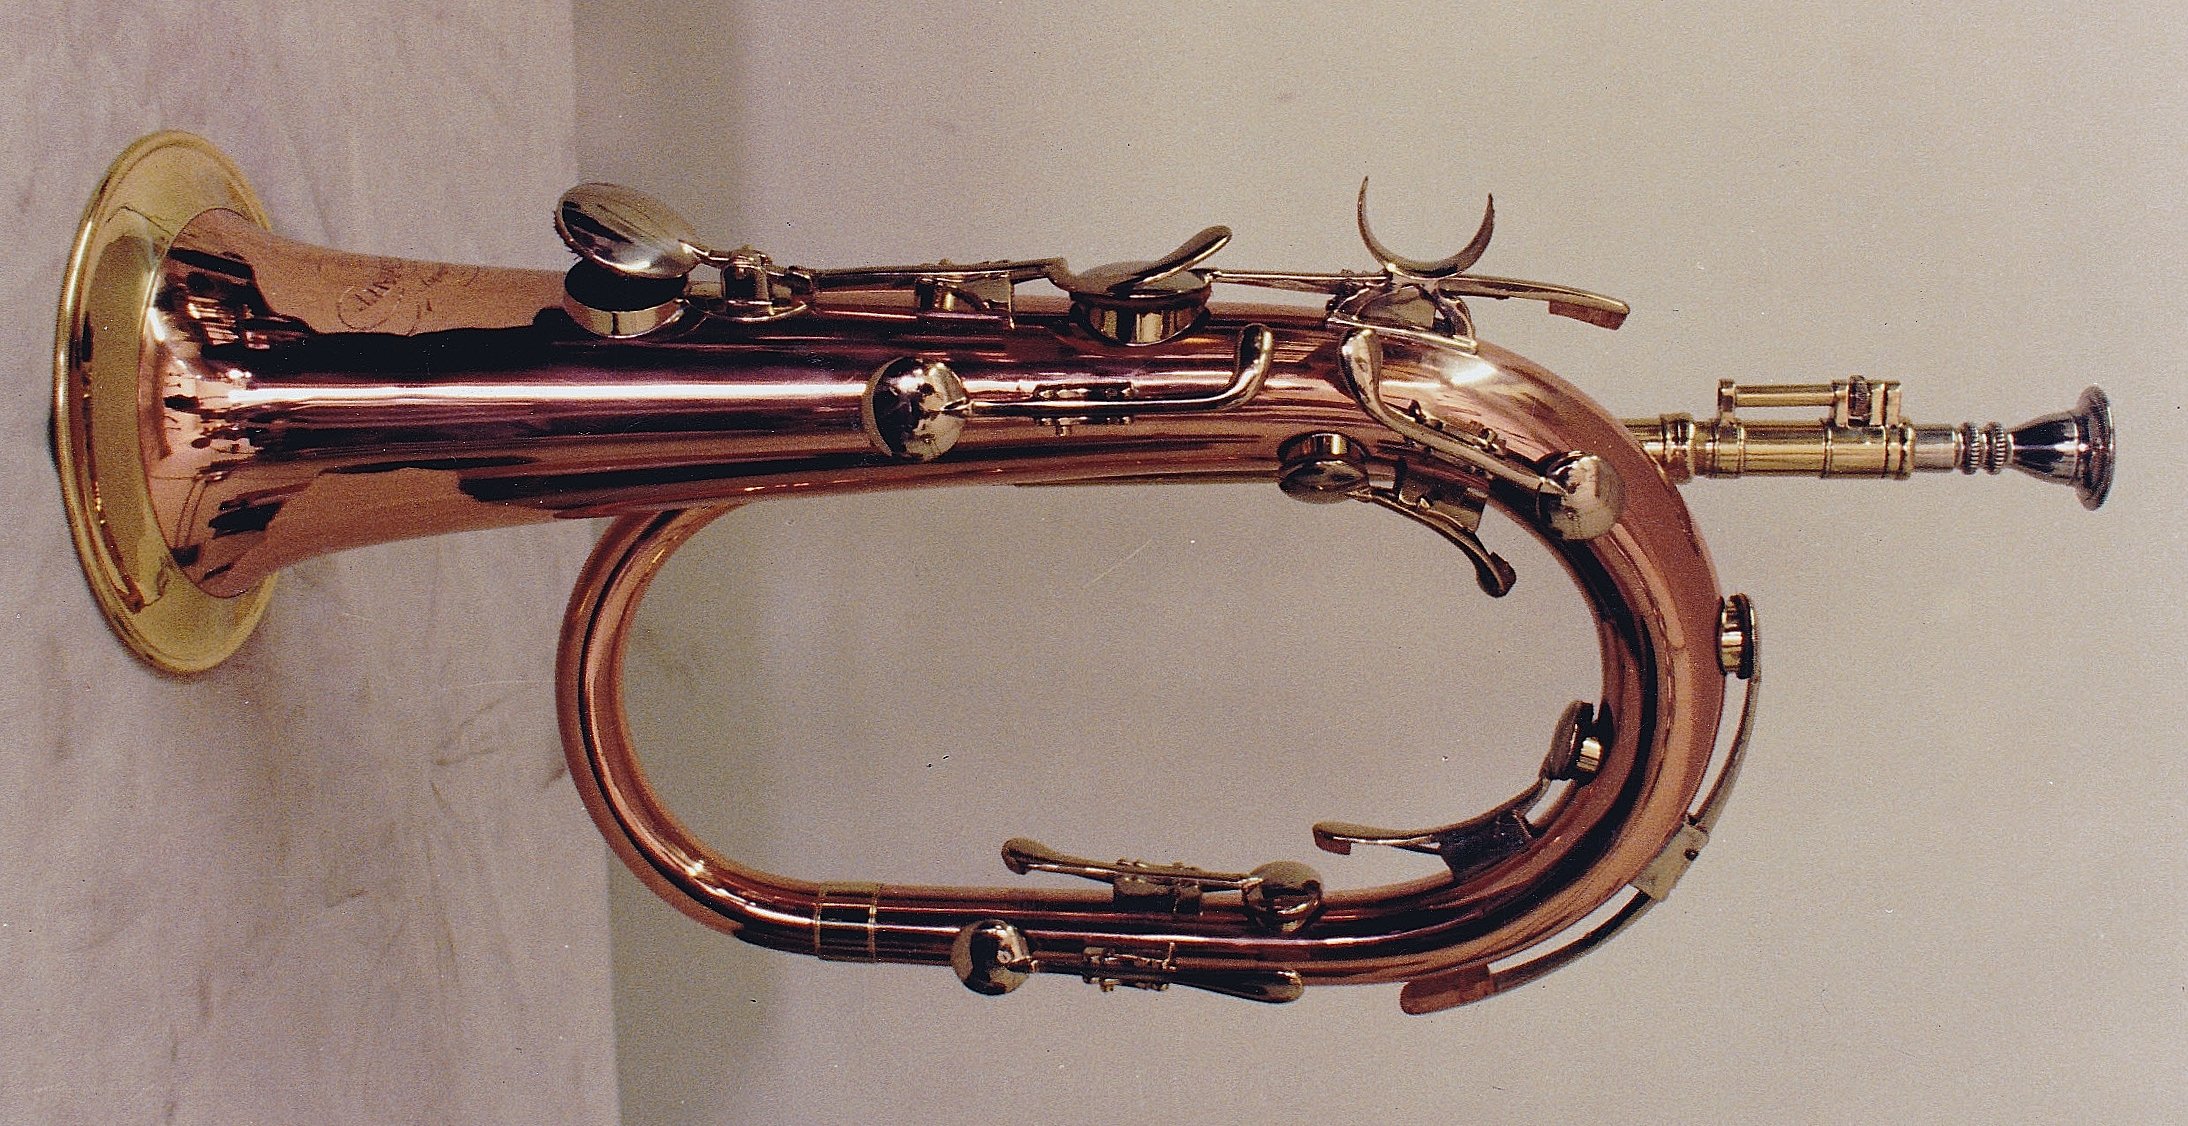
The first photo is of the first keyed bugle that I made for a customer in about 1985. I had bent a lot of tubing by that time, but I hadn't yet figured out how to bend such large diameter tubing in as small a curve as I wanted, resulting in a very wide keyed bugle. Even with such a wide curve, I recall that there was much rippling of the metal on the inside of the curve that had to be hammered down.
I experimented with different materials for filling the tubing, including pitch (which I use most often), lead and Cerrobend (a tin based metal formulated for this purpose which is available from McMaster-Carr and other industrial suppliers). The results were similar with all of these filling materials, although there are a few pointers for each that will help.
First, be cautions when working with hot liquids. Any of these materials can cause very bad burns.
When using pitch, temperature when bending is important. It will likely vary, depending on the formulation of the pitch, but I get best results at between 60 and 70 degrees Fahrenheit. With both lead and cerrobend, it is important to coat the inside of the tube with oil, any sort of motor oil will do. Cerrobend must be quenched or cooled very quickly after pouring. Have a large enough container of cold water ready to lower the part in as quickly as possible. For larger diameter tubing, I put plenty of ice in the water. This is not necessary with lead and can be dangerous if the molten lead splashes in the water.
With both lead and cerrobend, the temperature during bending is less important than pitch, but emptying must be done in an oven. Using a torch will get spots of the brass too hot resulting in a loss of surface tension of the oil and the filler metal will stick to your tube. You will have a very hard time getting it all out in this case. I highly recommend using an oven for emptying pitch as well. It is much easier to do it safely and the residual pitch can be dissolved and washed out with a solvent such as kerosene.
The next photo is 1/2 inch outside diameter tubing, typical size for trumpets, cornets and French horns. The shape of the curve is the result of bending by hand around a round form, which is the most common practice in repair shops. The shape isn't as round as might be predicted, with the smallest radius in the center of the curve. This is caused by the leverage being the greatest at that point. There is nothing wrong with this shape acoustically and some trumpet makers will try to convince you that it is a superior shape. For my aesthetic it looks sloppy, but I suppose this comes from the amount of effort that I have spent in avoiding this shape.

In a high quality repair or restoration, such as replacing the mouthpipe on an early Bach cornet, most would expect the replacement to both function and appear very close to the original. As to acoustics in this instance, I find that any well designed Bb cornet mouthpipe, such as those available from Allied Supply or makers such as Kanstul can be very satisfactory. Towards this goal, careful attention must be paid to the internal dimensions of the replacement. I match the diameter at the small end of the replacement to the original and have had no complaints (I am always up front with the fact that the replacement was not made by Bach).
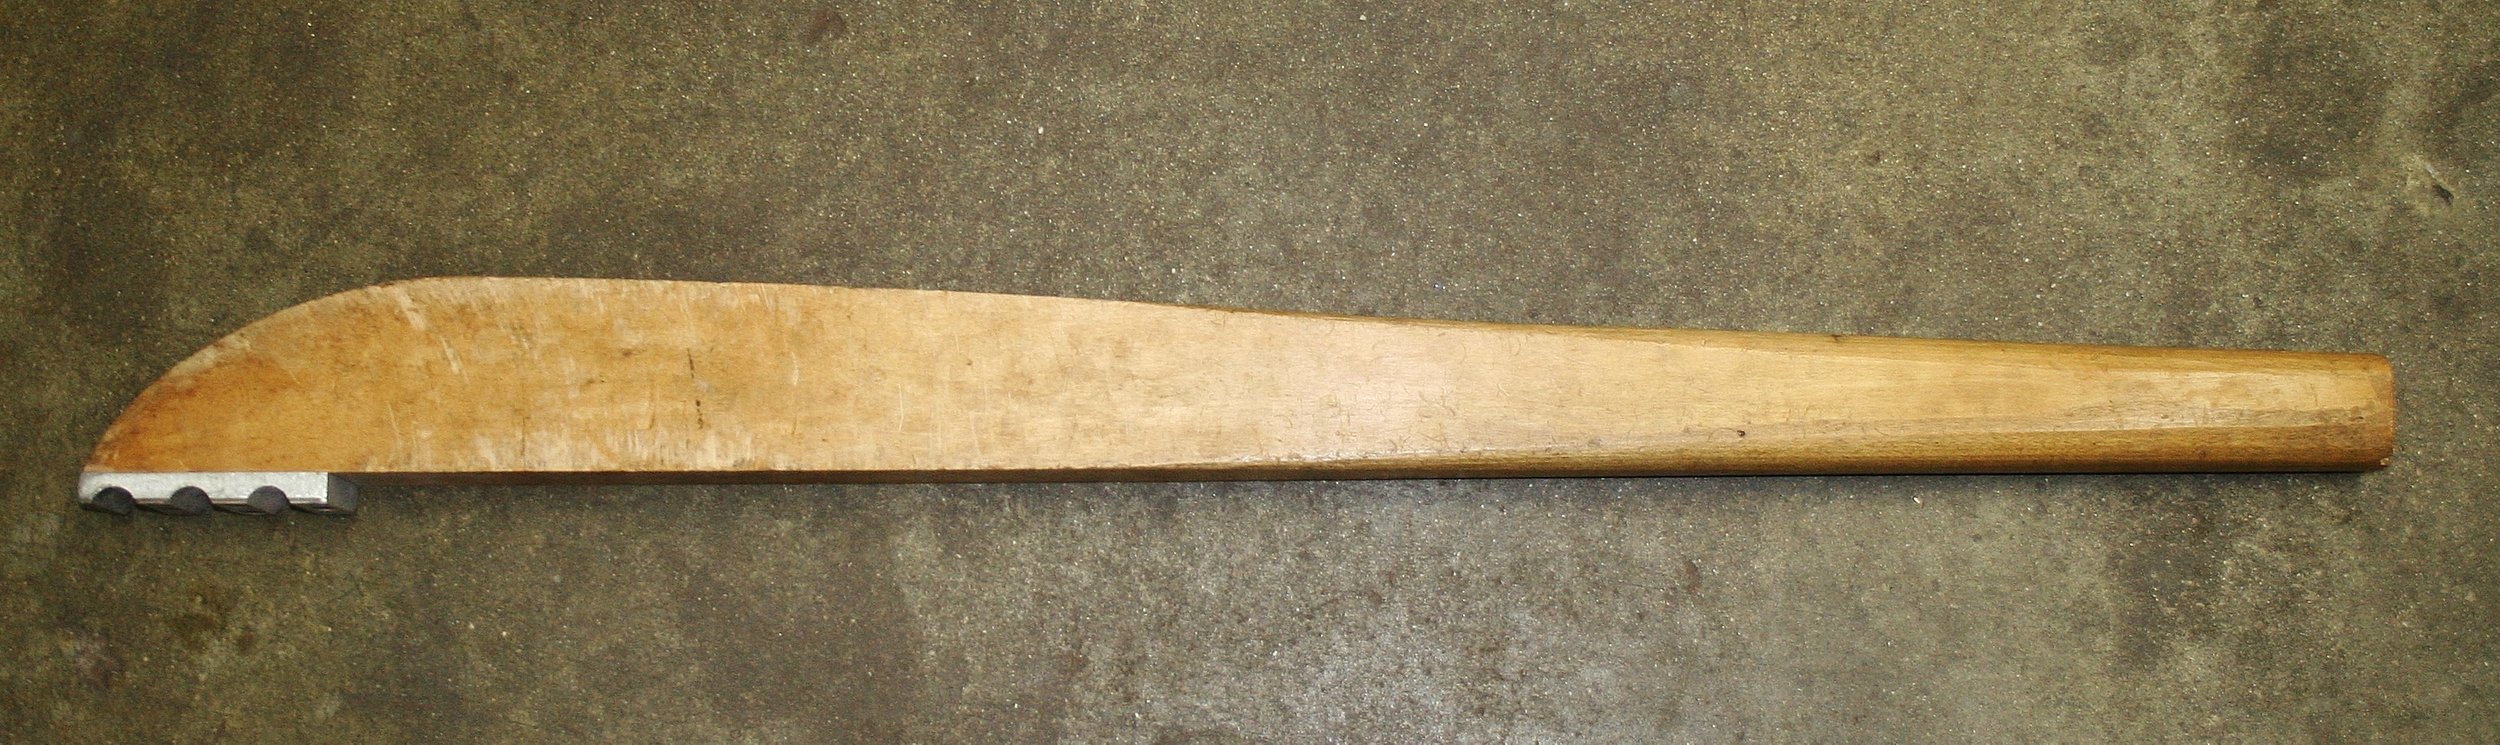
In order to get the nice square bends as in the originals, it is a great help to make wooden forms as seen in the mext photo. The middle of the curve will still receive more bend, not hugging the form unless it is held against it at that point.

The next, more challenging bend will illustrate this. These are bells made for pocket trumpets or cornets and demonstrate what I learned on the very next keyed bugle that I made after that illustrated above. I found that if I bent the bell about half way, emptied it, annealed it again and refilled it, I was able to make these tight bends with minimal rippling and no tearing of the metal and thus less distortion of the tube and less work involved. The next photo shows the first half of this accomplished.

The next photo shows the finished bend. You can see that I have the form clamped to a steel plate with many holes drilled in it. One wedge holds the flare end of the bell in place and a second wedge holds the middle of the curve against the form, moving the maximum leverage to the point between that wedge and the bending lever, which is seen at the bottom of this photo. A pad of soft wood or leather prevents damage to the tube. The form lets the tube be bent slightly farther than the finished bend, allowing for some spring back. You can also remove it from the jig and give it a little more bend if necessary.

In the next photo is seen the whole lever. In some of the videos on YouTube, you will see well made bending jigs that are designed to bend one part in one shape. While these are instructive in general, I must find techniques for bending the widest range of parts in many shapes. I made the lever hefty enough to bend tuba and euphonium branches. If you are only going to work on smaller instruments, I would suggest making a lighter version of it.
The seventh photo shows what can be done when the tubes are too short to bend. In most cases, you will need extra length to push against and very often the piece at hand is too short. I silver solder a piece of scrap brass tubing on the end before annealing and filling the tube. In this case, I was using an existing Olds Recording model cornet bell to make a pocket version for Nick DeCarlis. I wanted all of these pieces to retain the red brass "Rey-O-Loy" in the finished instrument, so I cut the bell into three pieces, the straight ones to be bent and the original bell curve had to be manipulated to a different shape to fit. This technique extends the possibilities using existing parts and materials at hand.


The last photo shows a relatively sharp bend being accomplished using a form made of Jett Sett Fixturing Compound. This is a plastic material that contains ceramic to make it stronger and can be formed or molded at temperatures between 150 and 180 degrees Fahrenheit and becomes very hard at room temperature. It is available from Rio Grande. Ideally, you would need an existing tube of the correct diameter and slightly tighter curve to shape this form, but with a little ingenuity, you can think of other methods.
