Replacing Threads on Valve Casings
We've all seen this on an old trumpet or cornet: the bottom threads on the valve casing have broken off. This is rarely worth repairing and usually renders it a parts donor. Some instruments, such as those by Conn and Bach from the 1920s and 1930s, were made with an insert soldered in the bottom, which is easily removed and replaced. Of course, there are other instruments where this is not the case and are worth saving. This old Besson is one of them.

1920s Besson trumpet with bottom threads broken off.
This instrument was in the process of a complete restoration, the silver plating was done and the valve refitting was to be accomplished last. The pistons had been refit at least once before, the casings are very thin and it didn't take much to loose the threads. Replacing the threads is actually rather simple with this technique.
First, find an adjustable hand reamer with the range needed: when adjusted all the way out, it will cut a rabbet with enough clearance for a threaded insert. Ideally, this would be .02" or more, but leaving the casing with at least that much thickness. Then make a brass pilot that threads onto the reamer.

Adjustable reamer and brass pilot made to fit reamer and valve casing interior.
The reamer does not need to be the highest quality which are expensive, but it must be very sharp. These are available from Ferree's and industrial suppliers such as MSC. In the past, I've made this cut without the advantage of a pilot, but it is impossible to guide it straight with just the hands. The resultant shoulder will not be square and you will risk deforming the casing. Making a pilot as in the second photo will make the job very simple. Be sure to cut the threads in the pilot so that it is a tight fit on the end of the reamer and make the outside diameter with no more than .002" clearance inside the valve casing.
Use your hands only, gripping the valve casings rather than the bell or other tubing, which would risk bending them or breaking a brace. The cut need not be more than 1/4" deep and remove only .005" with each pass. I mark the blades with a Sharpie for depth reference.
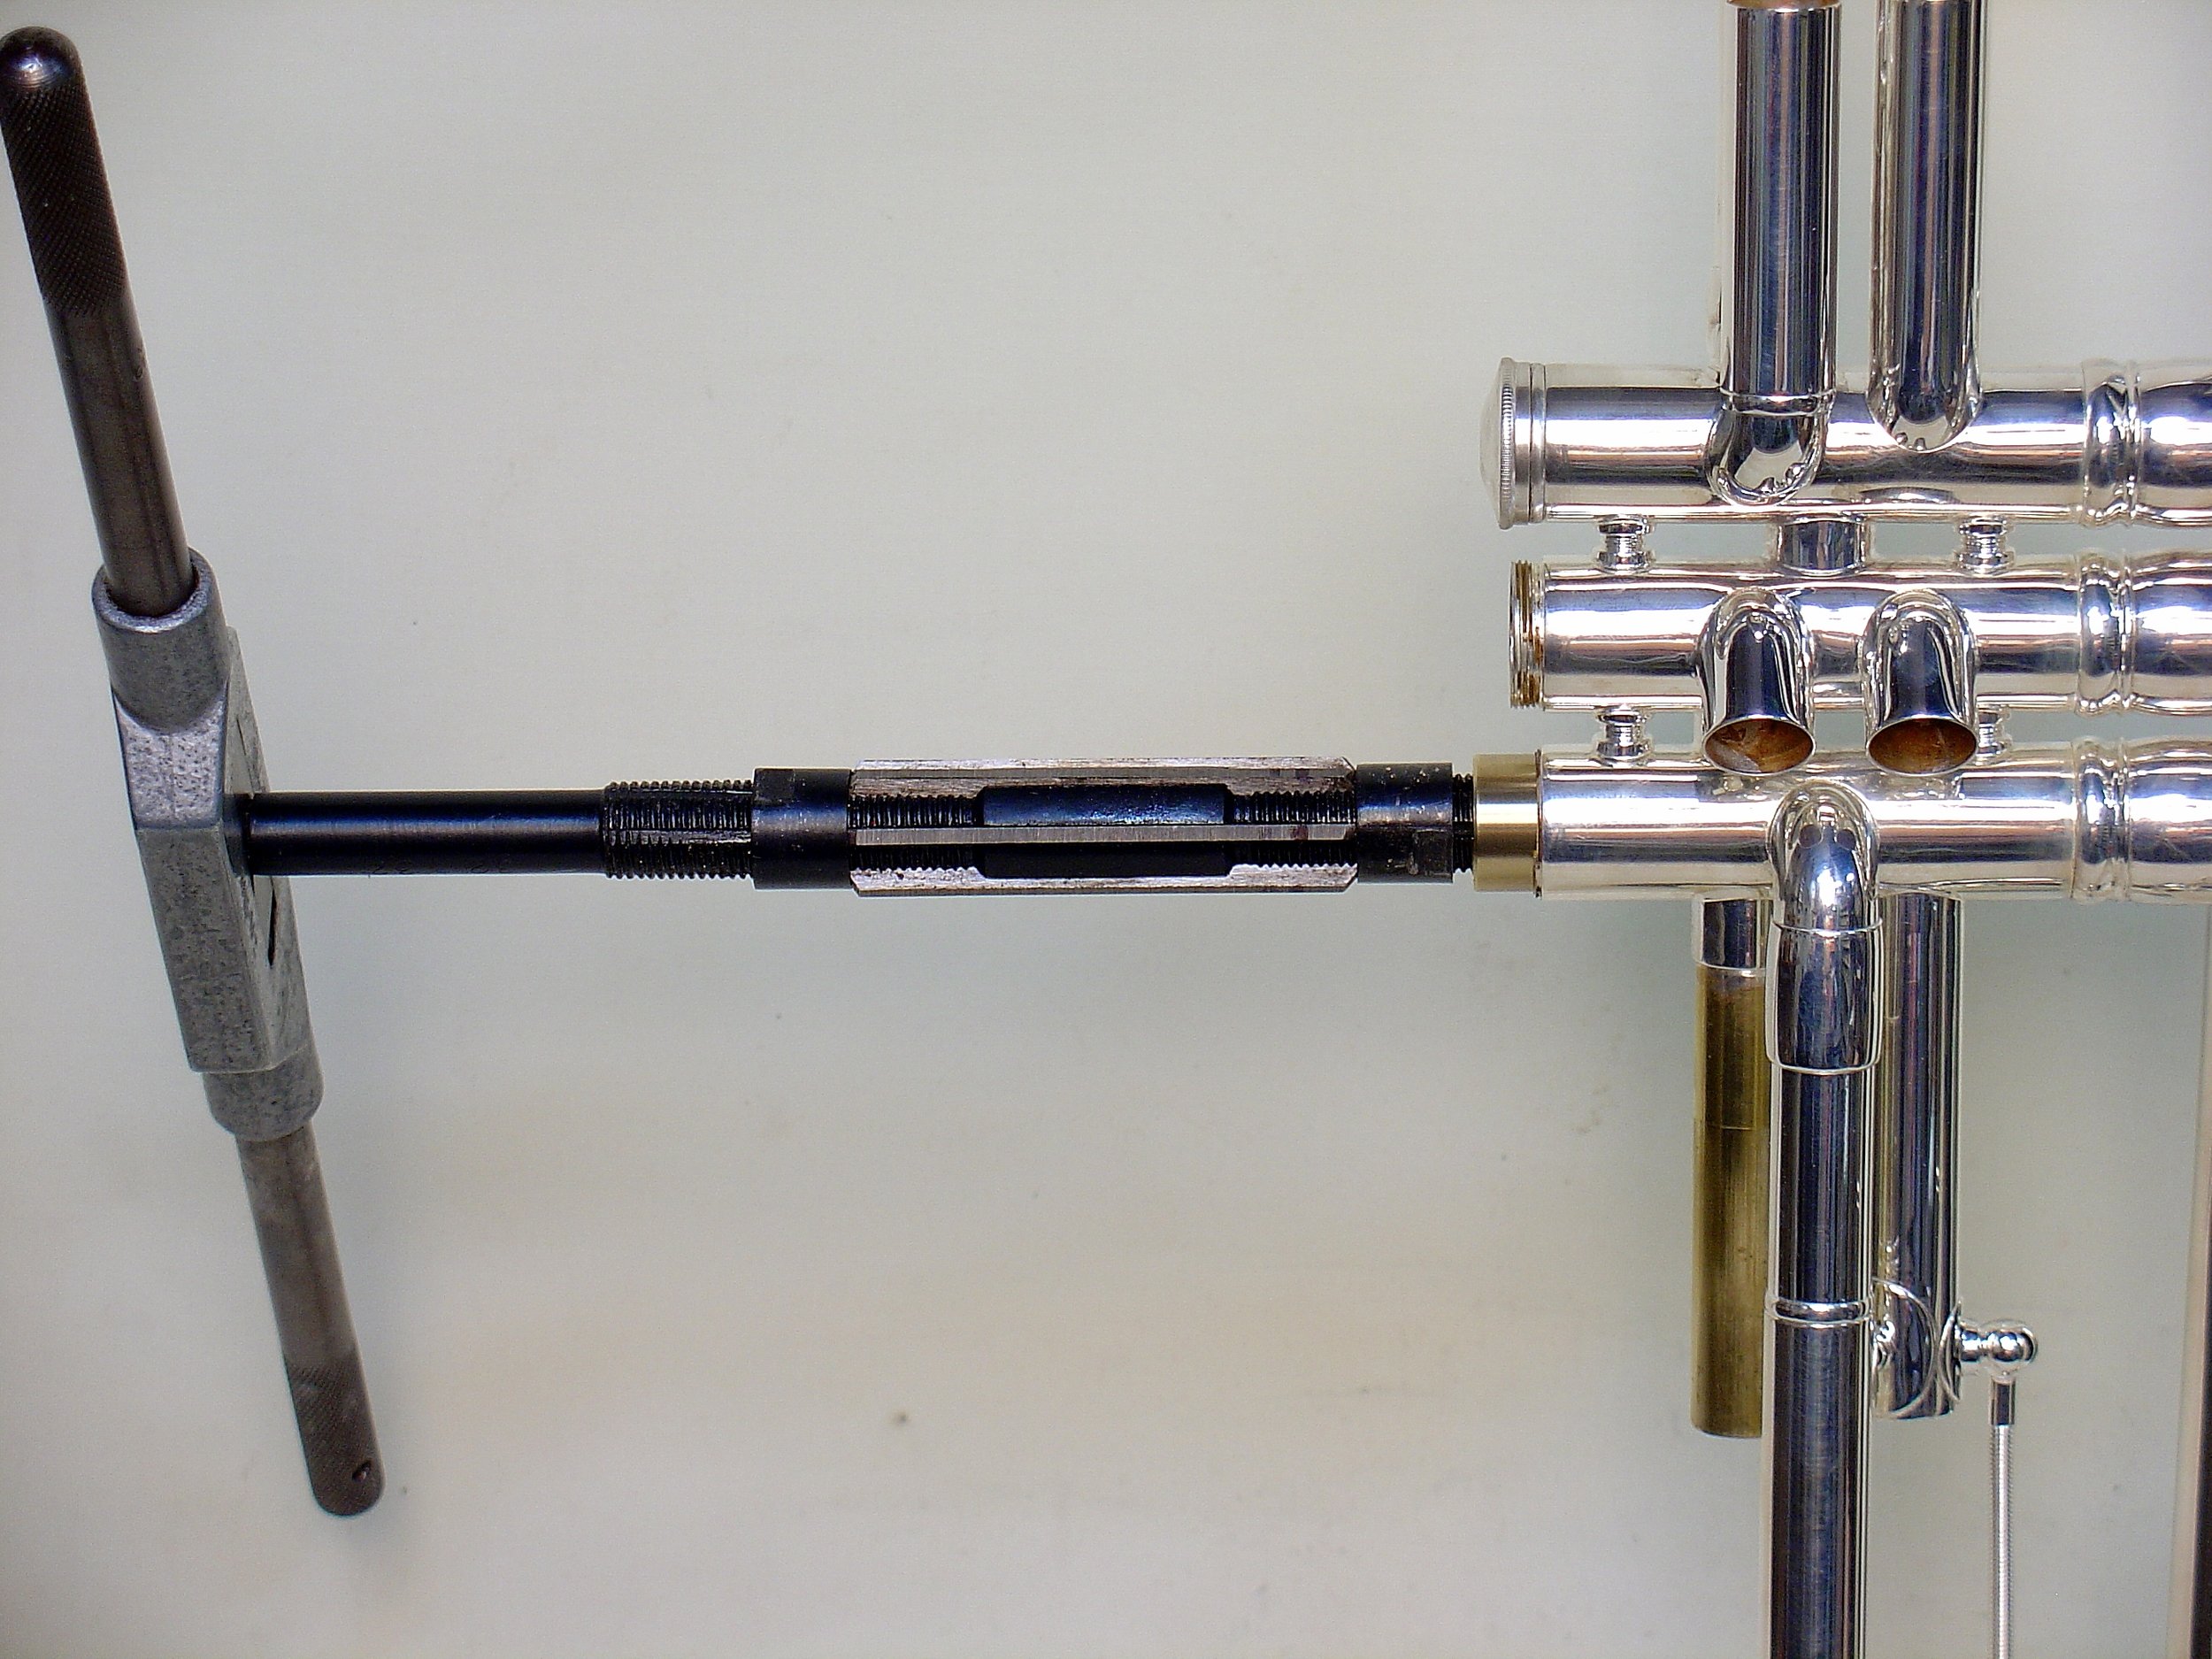
Inserting reamer for first cut.
In the case of old Besson instruments and many other antiques, the casing has inner and outer walls that are soft soldered together. When reaming, you will feel when the blades start breaking through and you will see the solder as in the fourth photo.

Partially cut through inner casing and needing additional scraping.
It will never cut perfectly concentric with the outer casing and I prefer to stop as soon as I can see that it is scraping through the solder at one side. In cases where the casing is a single tube thickness, keep measuring as you progress. With a very sharp hand scraper, I remove the rest of the inner casing up to the shoulder. Make a threaded insert as seen in the fifth photo, so that the inside diameter is at least .002" smaller than the casing inside diameter.

Threaded insert ready for installation.
Besson threads are metric, with the closest equivalent being 34tpi and most American lathes don't have that choice. I find that 32tpi is completely satisfactory in this case. Even if you end up with some interference with the piston after installation, you can carefully ream or hone out the insert from the bottom. Ideally, that step and the danger of additional damage should be avoided. Install the insert and solder from the inside, trying to avoid getting solder in the threads. If all went well, the job is done. Clean it up and watch for the big smile on your customer's face.

New threads installed.

Finished job.